Malware Development For Offsec: Implementing Custom Malware Loaders 1
Overview
A malware loader is a piece of malicious software used in the initial stage of an attack. A loader can drop or download files on the system for further stages of the attack. More advanced malware loaders also have the capability to perform initial assesment of the machine for detecting virtual environments to make sure to proceed further or not.
Contents
- Setup/Introduction
- Find and load resource
- Creating legitimate windows process
- Copying payload to remote process
- Changing entry point to main thread
- Executing the program
- Downloads
Setup/Introduction
In this writeup we will implement a custom loader that will spawn a legitimate process and inject our payload into it.
The payload will be a custom Shellcode which in real world scenario could be anything from Meterpreter to Cobalt Strike payload. The payload implementation will not be discussed as it is out of scope for the write-up. This write-up focuses on the implementation of loaders and the payload used is made specifically to demonstrate the functionality of the loader.
Below are the steps the loader will take to execute the final shellcode.
- Finding and retrieving the address to out payload from the resource section
- Create a legitimate windows process.
- Copy payload to remte process
- Changing entry point of the main thread to the payload
It is the responsibility of the shellcode that the process in which it is executed does not crash and execute after the shellcode has completed the task.
Note: The loader is implemented in C and compiled for 64 bit systems. THe payload is provided in the GitHub folder as payload.ico.
Find And Load Resource
In our case, the payload to be execute is stored inside the resource section. Therefore, the following APIs are used to retrieve the location of it.
- FindResource()
- LoadResource()
- LockResource()
FindResource() is used to obtain a handle to the information block for the resource. Below is the API definition for FindResource() and its usage.


The first argument takes a process ID. Since we are searching for the resource in our process it is defined as NULL. The second arguemnt takes the name/ID of the resource as input. MAKEINTRESOURCE macro will convert PAYLOAD_ICO into an int value defined inside resouce.h file in the project. The third argument is the type of data which is RT_RCDATA i.e raw data
The handle obtained from FindResource() API is then passed on to the LoadResource() API to obtain a handle to the resource. The API definition and its usage is as follows.


The handle obtained is then passed to LockResource() API to obtained a pointer to the resource i.e the payload in out case. The SizeOfResource() API is used to obtain the size of resource which will be used later for memory allocation in th created process.

Note: If a well known payload is stored inside the resource section without obfuscation/encryption, it can lead to immediate detection by Anti-Malware products. Therefore such payload should be obfuscated if being stored in the resource section.
Creating Legitimate Windows Process
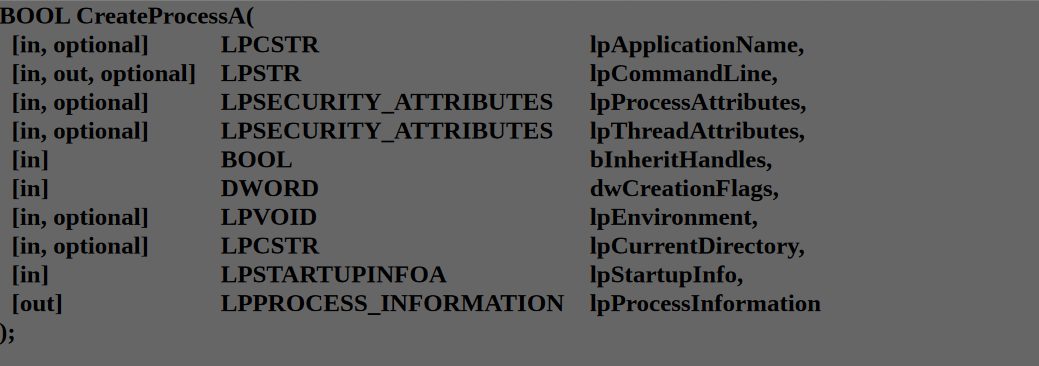
For this task the API used is CreateProcessA. CreateProcess has two variants CreateProcessA and CreateProcessW. As the name would suggest, APIs ending with A take normal strings as input and APIs ending with W take wide character strings as input.
Below is the API definition for CreateProcessA.

The parameters of interest are lpApplicationName, dwCreationFlags, lpStartupInfo, lpProcessInformation. Below image shows the implementation in code.

lpAPplicationName takes the full path of the application to be opened which in this case is cmd.exe. dwCreationFlags takes the value of CREATE_SUSPENDED as the context of the process needs to be changed to our Shellcode before it starts executing. lpStartupInfo is used to provide certain information used to start the process. We don’t need to define any specific value to this structure in this case the structure is zeroed out. For reference take a look at the structure definition here
lpProcessInformation parameter is where the information about the new process is returned. The processId i.e dwProcessId and the handle to the process i.e hProcess/hThread value is what we need for later use. It is defined as below.

Note: The process here can be any process whose handle can be acqiured. The method in this writeup is spawing a process but code can be injected into a running process as well.
Copying The Payload To Remote Process
Payload can be copied directly to the remote process but if the payload is encrypted it is required that payload is decrypted before copying as the execution will directly be passed to the payload later and if it is encrypted, it will lead to the process crashing. In our case encryption is not implemented but may be required if known payloads are used in order to bypass anti-malware products like Windows Defender.
To copy the payload to remote process we first need to allocate memory in the new process. For this NtAllocateVirtualMemory() native API is used. VirtualAllocEx could also be used but some EDRs or other anti-malware products may hook user APIs therefore its better to use native APIs. In the worst case even the native APIs may be hooked by AV/EDRs. In this case direct syscalls can be used.
The method used to retrieve the address of NtAllocateVirtualMemory() is discussed in detail in one of my previous writeups. It basically finds the address of ntdll.dll in memory, traverses the PE structure to get to the Export Directory and from there finds the base address of NtAllocateVirtualMemory() API.

The API definition for NtAllocateVirtualMemor() and its usage is given below.


pi.hProcess represents the handle to the process obtained using CreateProcess() API. The second parameter &RemoteBaseAddressALlocatedMem is the variable that recieves the address of the allocated memory. Note the value for page protection rights 0x4 i.e PAGE_READWRITE and allocation type is 0x3000 i.e MEM_COMMIT | MEM_RESERVE.
After allocation new memory to the newly created process WriteProcessMemory() API can be used to write the payload to the newly allocated memory.

RemoteBaseAddressAllocatedMem points to the memory address where the code will be written to and localBaseaddressAllocatedMem points the local address where the payload is stored. pi.hProcess parameter is handle of the remote process retrieved previously.
Changing Entry Point Of The Main Thread
Before changing the entry point of the payload the page rights of the memory need to be changed to PAGE_EXECUTE_READ from PAGE_READWRITE. VirtualProtectEx() API is used in our case but NtProtectVirtualMemory() could have also been used.

Note 0x20 i.e PAGE_EXECUTE_READ. The other parameters are pretty similar to the NtAllocateVirtualMemory() API used previously.
Since we created the process in suspended mode, after the process is resumed the process will start execution from its entry point defined when the program was compiled but that won’t execute the payload. Therefore the context for the main Thread needs to change.
Context basically refers to the state at which the thread exists at that point i.e the register values that define the state of the thread. The thing to remember is, you can only change the context of a process if you have a handle to that process which we retrieved when we created the process in our case. But when injecting to a process that is already running OpenProcess() API can be used.
GetThreadContext() and SetThreadContext() APIs are used to retrieve the context and change it respectively. GetThreatContext() API is defined below.


The first parameter is the handle to the main thread and the second is the pointer to the CONTEXT structure that will contain the values of all the registers. The CONTEXT structure is big and stores the values of all the registers, for reference check it here.
The value we need to change is the rcx register value, as it contains the entry point of the process. SetThreadContext() API is defined similarly as GetThreadContext() API as shown below.

After changing the context we can use the ResumeThread() API, which takes a single parameter to resume the execution of the process.

Executing The Program
The main files for the project are shown below.

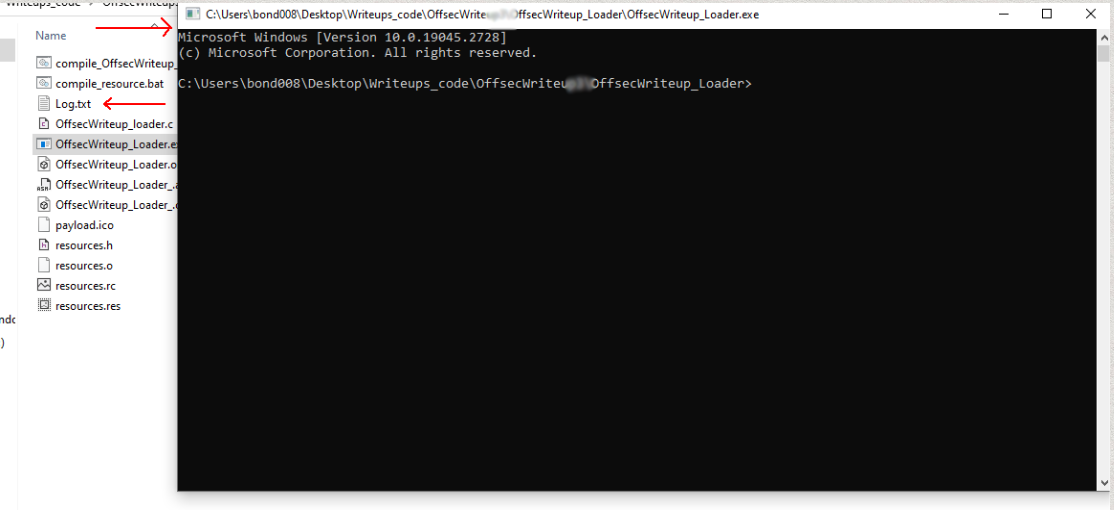
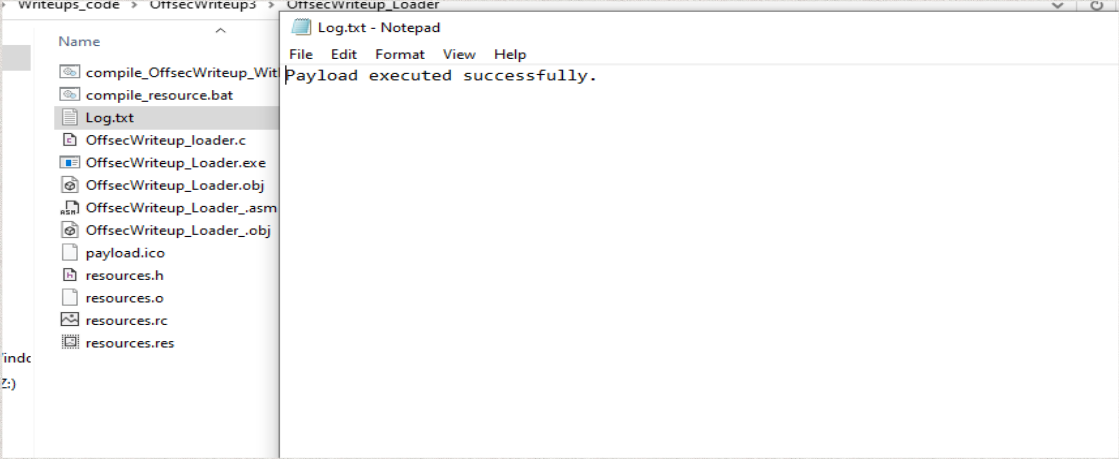
payload.ico is the file that contains the payload. OffsecWriteup_Loader.exe is the executable that is the main loader. On execution we can see in the images below the cmd.exe process is started and Log.txt represents the file created and its contents after execution of the payload.

